How to Replace an Electrical Outlet
Replacing outlets might look simple, but electrical work rarely plays nice with shortcuts. Outlets connect directly to electrical systems — one wrong move risks shock, fire, or damage that costs more than the outlet itself.
Outlet replacement steps include:
- Step 1: Turn off power and confirm it’s off
- Step 2: Remove the old outlet and label wires
- Step 3: Install the correct replacement (standard or GFCI)
- Step 4: Reassemble, restore power, and test safely
- Why hire a licensed electrician for outlet replacement
Let’s explore the outlet replacement process — you’ll learn why calling Elliot Services saves you time, money, and stress.
Schedule Safe Outlet Replacement with Elliot Services
If you don’t know how to replace an outlet on your own, don’t risk injury or property damage trying to figure it out. Contact Elliot Services for safe, reliable, and high-quality residential electrical service.
Step 1: Turn Off Power and Confirm It’s Off
Flip the correct breaker in your electrical panel, and post a note to ensure no one switches it back while you work. Use a non-contact voltage tester to verify that the outlet has no current. Never skip this step and always test outlets directly — assuming you have the right breaker puts you at risk, as panels often have mislabeled circuits.
Although you may know how to replace a wall outlet, always confirm zero voltage. Stop immediately and call Elliot Services if you encounter aluminum wiring, shared neutrals, or scorched boxes. These situations require professional attention, not DIY fixes.
Step 2: Remove the Old Outlet and Label Wires
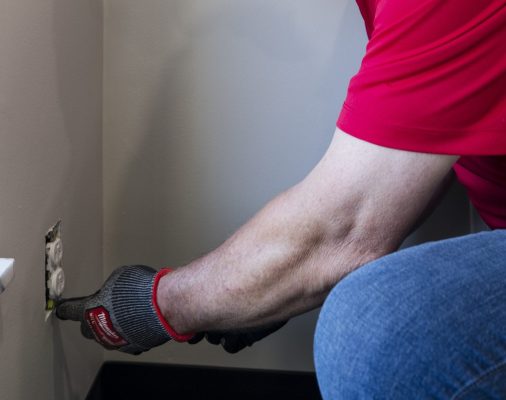
Once the outlet tests safe, unscrew the cover plate and gently pull the outlet from the box. Keep wires bent outward for visibility, identifying each conductor as you go: black wire to brass terminal (hot), white wire to silver terminal (neutral), and bare or green wire to ground screw. Speed reinstallation by snapping a quick photo with your phone or tagging the wires with tape.
Many older homes have back-stabbed connections — wires pushed into the outlet’s back holes — which often loosen over time. For stronger connections, move the leads to the side screws and tighten them properly. When explaining how to replace a wall outlet, always emphasize the importance of correct wire placement — mixing hot and neutral wires can reverse the polarity.
Also, check the box condition before reinstallation. Overfilled or cracked boxes pose a fire hazard. Replace damaged boxes or ask Elliot Services for safe alternatives.
Step 3: Install the Correct Replacement (Standard or GFCI)
Choose outlets matching your circuit’s amp rating and wiring — most household circuits use 15-amp outlets, but higher-load spaces require 20-amp models. Many local codes require tamper-resistant receptacles, especially in homes with children.
Wet or damp areas require GFCI protection, but only the circuit’s first outlet needs it if you connect downstream outlets to its LOAD terminals. When replacing these outlets, carefully connect hot and neutral wires to the LINE terminals and test the built-in buttons after restoring power.
Follow the manufacturer’s torque specifications when tightening screws, and use pigtail grounds for connecting multiple wires. Modern codes favor AFCI protection — something best confirmed by licensed professionals.
Step 4: Reassemble, Restore Power, and Test Safely
Before outlet reassembly, mark the date on the cover plate for future reference. Fold wires neatly back into the box, mount it flush with the wall, and replace the cover plate without over-tightening. Restore breaker power and use a receptacle tester to confirm the correct polarity and grounding — press the TEST button and then RESET on GFCI outlets to verify proper operation, noting the results.
Mistakes here can get expensive. Loose connections or reverse polarity can increase fire risks or damage electrical systems, costing more than the cost to replace an outlet professionally.
Why Hire a Licensed Electrician for Outlet Replacement
DIY projects sometimes save you money, but replacing an outlet rarely makes the list. Professional electricians have specialized training, advanced equipment, and in-depth code knowledge that homeowners can’t match.
Here’s why hiring Elliot Services makes sense:
- Safety first. Our licensed electricians prevent shock, fire, and code violations.
- Code compliance. We ensure tamper-resistant, GFCI/AFCI, and bonding requirements meet current standards.
- Quality craftsmanship. Proper torque, secure grounds, and clean workmanship deliver reliable results.
- Efficient diagnostics. We quickly catch hidden issues like upstream loose neutrals or overloaded circuits.
- Transparent pricing. Outlet replacement costs depend on the type, accessibility, and code requirements.
Book Professional Outlet Replacement with Elliot Services
Electrical work demands more than DIY courage — it requires precision, compliance, and an expert touch. Trust Elliot Services as your full-service contractor for residential electrical services. We handle outlet replacements quickly, correctly, and safely.


